
The Moka Pot is a traditional Italian tool for preparing coffee. They're nick-named (unhelpfully) "stove-top espresso makers". They're sometimes confused for 1970s percolators, but they're very different because the water only passes once through the coffee. Unfortunately, many people have them but never use them, because they have the view that they prepare coffee with an unpleasantly strong, bitter taste.
I've increasingly found I'm using mine as a method of choice. I don't normally like dark roasted beans, and struggle to brew anything drinkable, but I've found that (good quality) dark-roasted beans can yield a creamy flavour from the moka pot. For a lighter, brighter roast, moka pot can make an absolutely delicious brew that is very clean. It's all about how you use it.
I thought I'd write up the lessons I've learnt, and maybe a few readers here will dust off and polish theirs from the back of the cupboard.
How to Buy
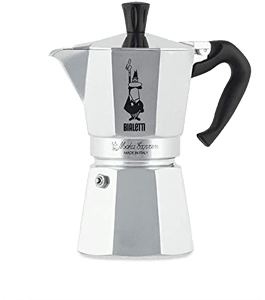
The most well-known brand is Bialetti. They come in a range of different sizes (remember these are coffee cup sizes - so "3 cup" = one modest sized mug). You probably don't want the very cute 1-cup size!
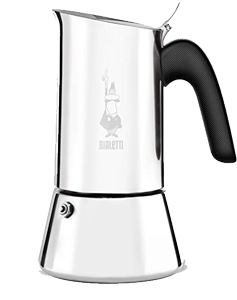 (paid link)You can buy in Aluminium (which tend to be octagonal) or Stainless Steel (which tend to be circular). Personally, I prefer the stainless, because it's easier to keep clean (see below on why that's important), and because coffee is potentially acidic enough to slightly erode the protective oxide layer on aluminium which could lead to metal cationic content dissolving into the coffee in small amounts. Stainless will also work on an induction hob.
- Aluminium: 4 cup (paid link), 6 cup (paid link), 9 cup (paid link), 12 cup (paid link)
- Stainless Steel: 4 cup (paid link), 6 cup (paid link), 10 cup (paid link)
Just a tip: I've found that the larger the size of the pot, the harder it is to work with. I'll explain why at the end of this post.
How They Work
They come in three parts. The bottom chamber contains water. A funnel houses ground coffee. The top chamber contains the brewed coffee. Water passes up the spout in the bottom chamber, through the funnel, past the metal filter on top of the funnel basket, and up the central spout in the top chamber to flow into the top chamber.
Here's what actually happens:
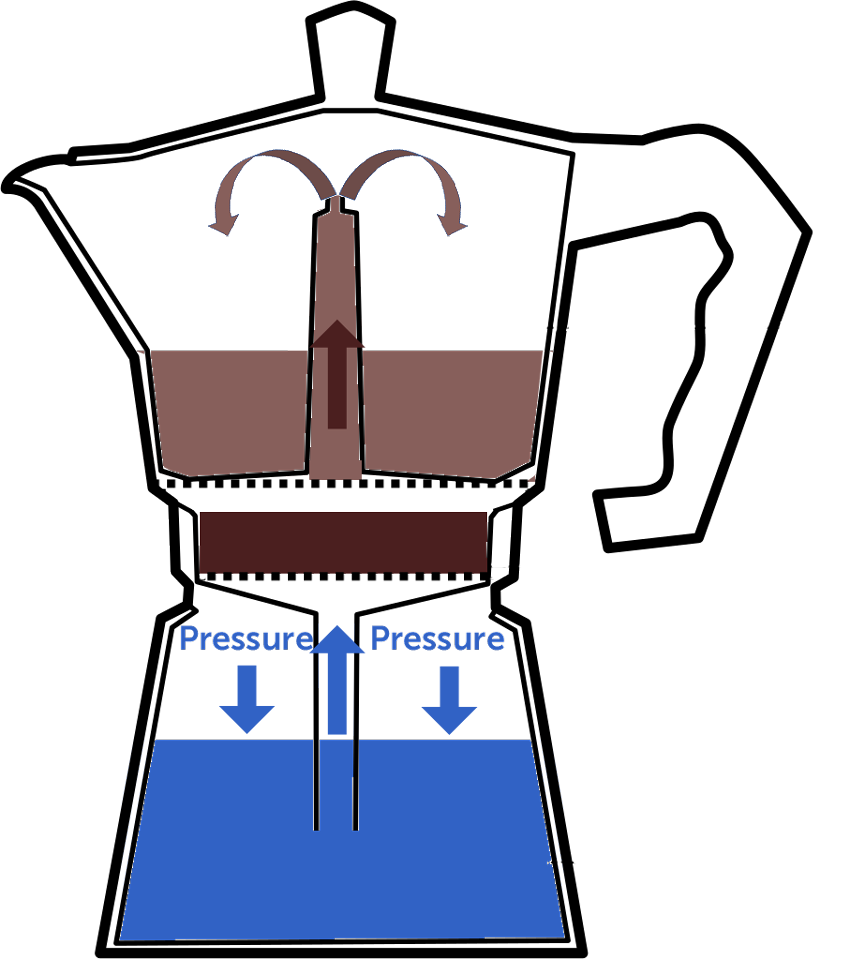
As the water heats, it evaporates, forming a layer of wet steam above the level of the water in the bottom chamber. As more water evaporates, it increases the pressure in the air above the water. Gradually, the pressure increases enough to start to push the water down, which then forces the water up through the spout and into the funnel. As long as the water keeps heating and evaporating, that pressure will keep pushing the water through the ground coffee and up the spout into the top chamber. Once that starts to happen, you can also get a slight syphon effect, so that the water is being pulled as well as pushed.
You don't want to brew with boiling water. You want water just below the boil. The evaporation becomes sufficient for the pot to do its stuff before the water gets to boiling point, so you don't need a boil for it to work. Making sure the water in the bottom doesn't come to the boil affects a few of the variables as to how you brew, as comes out in the tips below. There's a race on. You want to get the water brewed through the coffee and safely in the upper chamber as a tasty brew, before the water in the bottom starts to boil. How that affects the way you use the pot will become clear in a moment.
Lots of Tips
Here are lots of tips on getting the best out of your moka pot, including explaining where I went wrong for years.
- Keep your pot clean. For two reasons. Stale coffee oils turn rancid which will impart a bitter taste. There's a myth that they need to build up a layer of blackened old coffee, but this really is a myth. And you need to keep the seals between the two halves of the pot clean and free of grind-grit so that the pressure can build up without the steam leaking.
- Don't put it in the dishwasher. The bottom half, maybe. But there are too many confined spaces inside, and so the dishwasher detergent never really rinses out, and it never tastes the same again. So I'm told. If you want to clean more thoroughly, run it through with half a teaspoon of Puly Caff espresso machine cleaner (paid link) instead of coffee, then wash up, and run through again with clear water.
- Keep your pot maintained. You can buy kits from Bialetti that contain one spare metal filter and three spare rubber gaskets. Whenever the seal starts to get old and brittle, change it. After using three seals, change the metal filter so you have one that's clean with clear holes. Make sure you buy the kit for the right size and metal to match your pot.
- Look after that rubber seal. When you put it away in the cupboard, make sure it's all dry so the rubber doesn't perish faster. Screw the two halves of the pot together, but only loosely; storing it with the rubber gasket under pressure will only make it harden so that it doesn't seal as well.
 (paid link)Use hot water. When I first started with the moka pot, I used to fill the bottom with cold water, and then let it heat on the stove. Then, purely to save time, I'd heat water to 50 degrees, because I can still hold the pot to screw it together. Now, I use boiling water. It means you have to use a dishcloth or tea-towel to screw the two halves together. But all the time it's on the stove heating, those precious oils are evaporating from your ground coffee in the heat, which loses the most tasty parts of the coffee bean. So you want it on the stove for the minimum time. You certainly don't want to be heating the water with ground coffee warming too. So start with boiling water.
- Fill the water just below the line of the safety valve. A bit like a pressure cooker, if the path for the water to flow should be totally blocked, the safety valve can release the pressure safely rather than exploding an aluminium or stainless steel bomb!
- Use good quality arabica beans, chosen by skilful buyers, roasted within the last 3 weeks, freshly ground for this brew. Like you would whatever method you use to brew coffee. Right?
- Grind a bit coarser than espresso. Think somewhere between caster sugar and granulated sugar. You can tweak this to taste, but it's worth starting in the right ballpark. Remember, this isn't "stove-top espresso". You certainly don't want a Turkish grind. The water will be in contact with the grounds for longer than the 25s you get for espresso, so you want a coarser grind to achieve a smaller surface area to prevent over-extraction. You also don't want to choke the pot, so that the water can't pass through without boiling.
- Fill the funnel to just below the top. Don't tamp or pack. Maybe give it a little shake to flatten out the grounds a little, but you want the grounds to stay loosely packed rather than compressed. Moka pots operate under pressure, but much less than the 10 bars of an espresso machine, so water just won't get through a compacted puck. Again, you don't want the water to boil before it's brewed.
- Screw the two halves of the pot together nice and tight, to get a good seal.
- Put on the stove, and heat gently. This was where I went wrong for years. I'd put it on a high heat (encouraged by my use of cold water). The higher the heat, the faster the water heats up (obviously). The faster the water heats up, the less time there is between the water reaching a temperature where the evaporation will start the brewing process and the water reaching boiling point. With my high heat, I'd find that the water would start boiling when I only had a small amount of brewed coffee in the top chamber. With a lower heat, nearly all the water would brew through before boiling point is reached. Once you've got it working, experiment with the amount of heat to use. You maybe don't need to be too cautious. But you want it low. If you're brewing on gas, you don't want the flames licking the side of the pot either, as that will heat the dry grounds.
- When you hit boiling, STOP! As soon as you get that distinctive moka pot slurping sound, remove from the heat. That happens when the water down below is starting to boil. Jim Hoffmann suggests in a video running the base under the cold tap for a few seconds at this point to cool it down and stop the brewing process. Why not? You don't want those final over-extracted, over-temperature flavours contaminating your brew.
- Just a note: It will always hit boiling, so it's fine that you reach that sound. It's just that you have to stop when this happens. The reason is that, as more and more water brews through, there's less water left in the bottom, so the same amount of heat will ramp the temperature up progressively faster. You'll never get every last drop of water brewed through below boiling point.
- Pour, and enjoy. Add sugar / milk / hot water - to taste.
Small is Good
Back to my observation earlier that smaller pots are easier to work with. I've found that a 6 cup moka pot is much less forgiving at getting the variables right to achieve a full brew before the water boils. 3 or 4 cup moka pots are much easier to get right. Anything above 6 cups, and I almost can't do it. With a 9 cup moka pot, I typically manage to get half the water through and then I have to stop.
That must be to do with the volume of water that needs to be brewed. It takes longer to get that amount of water through the ground coffee, so you have to keep the water hot enough yet below boiling for longer. I can't understand why that's so hard, because the larger volume of water will also heat (climb in temperature) more slowly for the same amount of heat applied underneath. But it seems to be.
Over to you. Any thoughts on why brewing with the larger sized pots is so hard? Any methods you've found to get this to work? Or is it just me? Any other tips you'd recommend? Comment below.
Recent comments